Sunday, 27 January 2013

Today I made a few improvements to my scene, firstly I noticed my characters colours didn't blend in too well with the background and it looked kind of weird so I had a go at editing my textures in photoshop to help my character look more natural and fitting to the environment.


After I was happy with my character's skin colour I moved on to the sword because the blade seemed slightly blue and failed to represent mental much like his armour currently does. So I adjusted the material type to a more reflective material and tried a few different colours until I was happy with the appearance.


I then decided to change my characters armour however instead of using a plane Maya colour I decided to create a new metal texture for it using Photoshop, I then applied the texture to the old material type using the hypershade window and changed the brightness/contrast a few times until it looked as good as I could make it.


If I had more time on this project or was assigned it again, I would watch a lot more skin weights tutorials in order to help me understand how to do it more effectively for easier animating. I would also look up more complex rigging setups so I could animate his mouth. Then I would make the animation better at the end by making him chase the perspective camera and pull the sword out the ground as he gives chase. Another thing I wanted to improve was the background however I was unable to apply a bump map to the image because the material type is a image plane in order to avoid creases on the edges. So instead of adding a bump map I would spend more time in flash adding extra details to the mountains and I would make them look more realistic in Photoshop. Another thing I would consider doing if I had a nice camera would be to go and take some photos of some mountains to use as the background and then photoshop them in order to allow them tile correctly. Today I did watch a few Photoshop tutorials about creating mountains but all the tutorials I found used copyrighted existing images of mountains so I left it as the flash design background.

Final work links below.

Youtube Link: http://youtu.be/sXx8OZBqBMk

Youtube Embed:


Updated work files download: https://dl.dropbox.com/u/20541404/Tims_Final.zip

Saturday, 26 January 2013

Here is my final render, tomorrow if I get enough time I will improve it by redoing the bone weights and making a better animation.

HD Youtube link:
http://youtu.be/USAYKeT3muQ

Youtube embed:


Compressed blog version:


Drop box Maya files link, at this stage:
https://dl.dropbox.com/u/20541404/Tims_V1.zip
Next I rendered my maya image to see how it looks and it was not too good so I tiled it in Maya.

After that my background was looking pretty good so I also decided to tile both sections of my grass and create some lights for mentalray rendering.


To make my lights I created a second dome and tuned the incandescence up to full, I then turned of the maya light in rendering. I also created a spot light the same way by using a cube and placing it in front my character. I then changed the setting on this so it does not show up in renders.

One more test render and it's looking good.


I may make my orcs skin texture a bit brighter later on so he matches the background better.

Then I set up the setting for my render.


Then I created a simple camera animation using my perspective camera and batch rendered my video as   tiff image files. I then loaded these files in to After Effects and and exported it as a SWF file before converting it in to a .mov movie file at 720 hd for Youtube.


I also fixed my Ncloth before I rendered this video by deleting it and recreating it with point to object constraints to keep it in place. Here are links to a series of tutorials I followed in order to complete this work.

Ncloth tutorial:
http://www.youtube.com/watch?v=9GAZ5hdEGGc

Rendering tutorial:
http://www.youtube.com/watch?v=_N-TWfx3FpU

Rendering and light setup tutorial:
http://vimeo.com/4679753

Today I created a background image for my animation, I repaired my Ncloth, I created some lights and I rendered an animation to use as my final animation. As I was running out of time I did this quickly and the animation is rather short and not extremely exciting, so I will I will choose modelling as my speciality for this project or which ever area of the work I have done best at. I will try to complete everything tonight and then tomorrow I may have a go at improving my animation and re-rendering with any improvements I can think of.

The first thing I did was create the environment for my animation, upon reviewing a tutorial on how this is done I found that most of the work is in the pre production and texture of the background so I began design a few cliff walls in Flash.


When I created this I was sure to make each side of it match up so the image can tile incase I choose to do a three sixty camera spin in Maya, to do this I copy pasted one edge, I then flipped it horizontally, repositioned it and matched up the edges to fit the connecting cliffs.


I then added details and colour to my image as well as some sky.


Then I copied my image in to Photoshop and changed the offset in order to test how well the repeat tile effect works, and it turned out to work perfectly so I then saved it as a high quality jpeg to use as my texture.

Next up i followed a Youtube environment tutorial (link at the bottom of post) and created a dome to contain my animation and display my background texture I also added an image plane at the bottom to fill the gap between my grass hill and the background image.


Then I applied my texture, I adjusted the UV map in order to help my texture align correctly and I checked out how it looked.


I was not happy with how this first looks because the edge from my grass to my background is far to clear so I decided to edit my background image and add my grass texture to the grass below the cliffs in order to create a much better blend between objects.


As you can see I copy and pasted my grass texture on to a new layer and then duplicated it until it covered the lower part of my image, I then cut out the edges and deleted the top part of the grass so it was only on the lower part of the screen. I then put the opacity back to 100% and faded it on by converting it to a layer mask. This covered up the hill lines and gave me a slight problem so I soloed my background layer and colour range selected the black lines, and copy pasted them in order to place the black hill edge lines on top of the grass texture. Then I saved the file and checked the changes in Maya.

Youtube background tutorial:

http://www.youtube.com/watch?v=I1bViYb5WJY

Wednesday, 23 January 2013

Today I did a few things, I first tweaked the join weights of my main model, I couldn't really get my head around this so I did it for the bones that affect my animation and then tweaked them where I saw issues rather than perfecting the whole model.

Then I made a simple animation for my main character after following a simple tutorial on maya animations.

Next I finished of my avatar character by creating his ears and adding a floor for him to stand on, for the floor I used the same grass texture and bump map as I used in my main character grass stand.

Unfortunately this website is giving me some technical difficulties at the moment so I will upload screen shots of this later if I can.

Tomorrow or later I will begin creating my main characters back ground I plan on finding a good tutorial to help me use some effects in order to make the background appear far in the distance at high quality, I also plan to make it as a cliff edge with some sky behind it with my character stood on the hill in the foreground. After this I will work on the lighting, cameras and rendering before Friday.


Friday, 18 January 2013

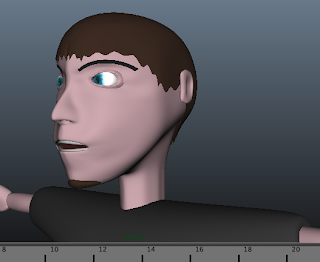
Today I finished patching up all the details on my avatar I knew as soon as I started doing this I could have spend all day on a small part trying to perfect it so I tried to make sure I didn't do this in order to save time by quickly moving on to the next part after I had finished the eyelids. I made the eyelids, teeth and mouth panel.

Here is the start to my eye lids, I then smoothed and added a color and also deleted the back faces that are out of view in order to reduce file size via lowering the poly count.
Then I added a simple shape for the teeth.
Then I added a plane inside the mouth to make the character more realistic.
Next I just need to create a floor for my avatar to stand on and then do some animation and complex work on my main character.


Thursday, 17 January 2013

I created some simple boots for my avatar, the only final stages left now are the extra details around its face.